Privacy & Cookies: This site uses cookies. By continuing to use this website, you agree to their use.
To find out more, including how to control cookies, see here:
Cookie Policy
I love Pinterest for homeschool inspiration. But for all that inspiration, my homeschool isn’t always “pinterest-worthy.” Sometimes our projects are very nearly pinterest-fails. And yet in those moments, I see my kids beam with admiration. They aren’t comparing their creativity to the perfect projects online; they are glorying in their learning success, reveling in the joy of creating something original. So why should I compare our imperfect homeschool progress to someone else’s? Learning is about discovery, not perfection. A pinterest-fail is NOT a homeschool-fail.
Case in point, we’ve tackled clay this year. And my kids have loved it! There is something soothing about wet, squishy clay that even my uber-sensory-sensitive child enjoys. We’ve tackled bas-relief, clay pottery, and sculpture. It’s been so much fun, and my kids will remember this year and our clay adventures for quite awhile, even though much of what they have created would not be necessarily pinterest-worthy. Our pinterest-fail is NOT a homeschool-fail; it’s imperfect homeschool progress.
My lesson plan was Greek pottery, but my kids had ideas of their own—including sculpting Alexander the Great (and a monkey face but somehow I didn’t end up with a picture of that one, another example of my imperfection for you). And just one week later, my daughter dropped her bowl while painting it, shattering it into pieces. Her presentation to her homeschool friends that week included how she had learned that Greek pottery is fragile.
Our display boards are another pride and joy. They worked hard on those projects and loved every minute of the journey, but few will find those images on Google and stand in awe. That’s okay! Because my purpose was not to impress others with our artistic ability. My purpose was to create lasting memories that fuel their love for learning.
Do you find yourself skipping a project because you know your kids can’t produce what you see on Pinterest or Instagram?
Are you tempted to micromanage the project to make it look better?
Are you embarrassed to share the final result?
Trust me, I’ve been there. But I’ve realized over the years it doesn’t matter; I’ve learned to share our homeschool imperfections proudly. As we cycled through history this year, I listened to my kids share about our first time through ancient history, squeal with delight when they saw favorite stories from five years ago, and recall for each other our first projects and adventures. I loved hearing their memories and realizing, this is why I make the effort at hands-on family learning. Not so that someone will re-pin our Nile River or our bas-relief, but because my kids will remember the year we played with clay and learned all about Greece and Rome. A pinterest-fail is NOT a homeschool-fail. No matter what others may see, we remember a huge homeschool success!
I remember in the past making a lot of excuses when it came to big art projects in our Tapestry of Grace curriculum. But on an impulse this year, I bought some air-dry clay. Maybe it was the creative rush of a brand new Hobby Lobby just opening in our area, maybe I was feeling excessively optimistic about our year—whatever the mind-set, I ended up with a big box of clay and no excuses. So I’m trying something new this year and braving the clay as we learn our history through art of different cultures.
First up on our tour, has been bas-relief. It seemed simple enough, as we read the instructions and looked at examples in our ARTistic Pursuits book. Carve out an image, smoosh the clay away from what you carved, add details, paint.
And honestly, it was that simple. All the kids enjoyed it. And I do love it when all my kids get to learn something together, from preschool to fifth grade. We learned Assyrian and Babylonian history through art and clay. We’ve been reading about the Assyrians bas-relief battle campaigns and, of course, the famous Ishtar gate of Babylon. Even my preschooler knows where the Ishtar Gate is on his talking globe. The boys chose to carve a dragon and a minion, while my daughter was inspired by the idea of Nebuchadnezzar’s Hanging Gardens.
This was a two week project, and part of my campaign to overhaul Mondays. If you follow my weekly updates via my email list, you know the struggle we’ve had with Mondays and my attempts to salvage something from these days. We do only math on Mondays, meet together about the upcoming assignments for the week, and do read-alouds and projects for the rest of the day. For this project, they shaped the clay one Monday and painted it the next.
None of the many fiascos I envisioned actually occurred, and I’m thinking I may even be brave enough to tackle Greek clay vases in another week or two. Homeschooling stretches us, doesn’t it? But I’m (usually) always glad I’ve taken the risk and been brave enough to try something new. Learning history through art and hands-on activities and fun read-alouds is exactly why I homeschool, at least one of my million or so reasons.
We’ve had so much fun with display boards recently that I just had to give you a peek at the action. As part of our Tapestry of Grace curriculum, we’ve been learning about the cultures and people of ancient Palestine during the time of King Saul, King David, and King Solomon. I love doing as much of our learning together as we can, so I assigned both of the older kids this display board project for their writing assignment. Immediately, they were all on board.
Preparation for the Display Boards
My preparation, overall, wasn’t bad. I printed off the Teacher Notes from our curriculum and highlighted the portions for them to read through for the writing part of the assignment, picked some images to print from Google images, and picked up some display board supplies at our local supply store. Each child picked their board, including Littlest, my preschooler. He wanted in on the action, and I figured getting him his own poster board would keep him from “participating” in the other kids’ projects in ways they would not prefer.
Directions for the Display Boards
We chose four cultures that had the most information available: Canaanites, Hittites, Philistines, and Phoenicians. And I gave them 3 weeks to work on it.
For my fifth grader, I assigned a paragraph for each culture. Other than providing his materials and showing him a few sample projects, I really did not do much more for him. He likes his independence.
For my third grader, I only required a couple of sentences for each culture. Because of her skill level and dyslexia, I helped her quite a bit more. I read the information to her rather than have her read it, and she used a new favorite app of ours to write her sentences. (Dyslexia Aid allows her to speak her sentence into the app, and it gives her the text for her to copy into her projects.)
For my preschooler, I gave him permission to use any left-over photos the big kids were not using. He got his glue stick and scissors and went to town. I love it! The red scribbles are his map of Palestine.
In Love with Display Boards
Seriously, we are in love with display boards, and I keep asking myself why I haven’t tried this sooner. My daughter has already asked about a hundred times if she can make another one. And it was an easy way to incorporate everyone at their own skill levels, interacting with the same information, which after all, is why I love Tapestry of Grace to begin with. I love whole family learning, and I love getting to put that learning on display.
I will admit, as I planned and plotted for this year, I wondered if maybe—just maybe—I’d tried to do too much. After all, the activities of 3 different geography curriculums did seem a little excessive. But I couldn’t help but love how the three complimented each other so well, one filling in for the gaps of the other two and vice versa.
Surprisingly, we’ve had plenty of time for everything! I’m stunned and amazed at how smoothly all of the components have fit together. Just to clue you in, Oldest does the maps from Tapestry of Grace on our magnet board; this is probably his most intensive mapwork. Then, Oldest and Middlest complete the simpler map work from Story of the World before listening to their audio history lesson, and we play Mr. Sprinkle with that map. Quite honestly, this map time is more for Middlest, but Oldest enjoys the fun activity and review.
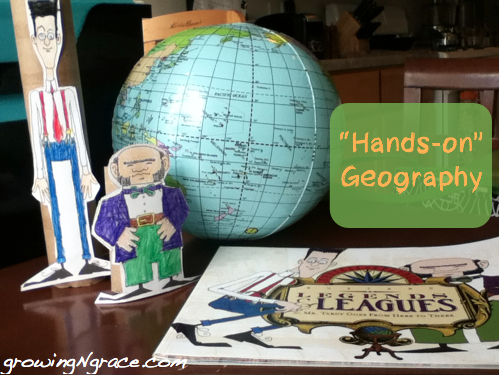
Last but not least, I added Leagues and Legends to our geography mix. Here’s why: my son needed to know how to use a map, not just how to locate Scandinavia and Normandy. L&L, as we affectionately call it, covers the equator, longitude and latitude, directions on a compass, how to draw your own map, and much more. The storybook tells a funny, memorable dialogue among three men, Mr. Tardy, Mr. Longitude, and Mr. Latitude. It’s short and thorough, and very entertaining.
Then, there’s the activity book, which has been a highlight for Oldest. There are enough activities to work one a week for about half the year. Some of the activities include toilet paper roll puppets for the characters, drawing a map of your room or neighborhood, coloring the different points on a compass, making your own compass, etc. And best of all, most of the activities are things he can complete by himself with a little instruction.
Rather than one more thing to do, Leagues and Legends has been another hands-on component to geography that my son looks forward to every week.
Pyramids! 50 hands-on activities to experience ancient Egypt
Among the many great ideas was an activity that illustrated how Egyptians moved blocks that weighed as much as a mini van to the tops of pyramids.
First, Oldest had to try moving a large, heavy book across the floor with his nose. Not easy!
Next, we placed a number of pencils underneath the book to simulate the logs the Egyptians would have placed underneath the large blocks they were moving. The Egyptians also added mud to the logs to lessen the friction and to slide the block along even easier. But even with just the pencils, pushing our large book was much easier.
Not only was it a great illustration, but it was a very memorable and fun way to study Egypt and add in a little science for a bonus.
I recently read a post on kinesthetic or hands-on learners that was absolutely intriguing. For one, it totally reminded me of my daughter in every way, but she’s only three and I hesitated to peg her learning style so early. And then I realized how helpful the tips for this learning style can be for any preschooler. Read through this list of traits for kinesthetic learners and tell me you can’t see your preschooler here.
They like to move: fidget, tap, wiggle. Bottom-line, they can’t sit still.
They can’t “see” anything unless they’ve touched it.
They are usually coordinated and do well at sports.
They have a dramatic way of expressing themselves.
They enjoy getting their hands dirty.
Now, aside from the coordination factor, I’d say that’s a pretty accurate description of many 3-4 year old (with a few exceptions: my son would definitely have been an exception to some of those).
As I did a little more research, though, I loved the ideas that I saw and could immediately see the potential for my preschooler.
Memorize facts by movement (hand motions, jumping jacks, etc.)
Take plenty of “movement breaks.” Every 10-15 minutes (or even more often depending on your preschooler), provide a wiggle activity or something to encourage movement.
Learn with lots of games and tactile activities—let your preschooler touch!
One post even suggested replacing the desk chair with an exercise ball (for older kinesthetic learners, don’t know how well that would work with my preschooler…hmmm).
Reading about this learning style really helped me to understand why certain activities were such a success and why others totally bombed, and it was extremely reassuring. The beauty of homeschool is the ability to tailor learning for what fits the kid. If my preschooler would rather match “Daddy” letters to “baby” letters than drill through a set of cards as the curriculum instructs, I can go with it! She’ll learn more than just letters; she’ll discover that learning is fun.
I’ve been teaching Van Gogh to my little ones recently, beginning with his painting of the “Bedroom in Arles.”
For his biography, I picked up a great resource at our book fair– Van Gogh: My Sticker Art Gallery. His pieces of art are stickers that can be added to the gallery spread telling about that period of the artist’s life.
Gallery Spread for Van Gogh’s early lifeVan Gogh Gallery Stickers
I emphasized three facts about Van Gogh our first week: he grew up in Holland; his little brother and best friend’s name was Theo; he liked to paint poor, hard workers. We also did a picture study of Van Gogh’s “Potato Eaters” painting. In other words, we looked at the hands of the workers and described them; looked at the room and the lighting and discussed what that told us about the people; looked at their meal and discussed why they were eating potatoes.
For our picture study of the “Bedroom,” I had two main activities. First, the kids colored pictures of the “Bedroom,” noticing colors and details. I had read about the painting earlier in my prep and brought out a few key ideas, like the fact that he painted with colors he liked (rather than the actual colors that he saw), colors that reflected the mood of his room–peaceful and happy.
Four year old’s work is on the left; two year old’s work is on the right.
They both did an awesome job with this, much better than I even anticipated. My four year old especially enjoyed this activity; it really appealed to his detailed personality.
Our second aspect of the study was from Spot the Differences Art Masterpieces. In this activity, the kids compared the original piece to a “fraud.” I really liked how this activity is subtly training them what to look for in a picture. For instance, the colors of the details and the personality of the artist (simplistic and very orderly vs. messy or disordered)–simple concepts right on their level.
During our second week, I ran across an idea on the website Art Explorer that suggested making a bedroom shadow box. It was so much fun, and an extremely effective way of teaching Van Gogh and his self-expression in his paintings.
Supplies: You’ll need a shoe box or something similar. I did not have a shoe box and had to improvise with lids from a box of cards and pieces of cardstock. You’ll also need paint, paintbrushes, and magazine pictures of furnishings.
Day 1: Because my kids are so young, I had pages of furniture pictures already torn from magazines and let them choose from the stack.
I tried not to intervene too much, since the whole idea of the project was to create a “bedroom” that was a self-portrait. It really was fun to see how much the “bedrooms” and their furnishings told of their personalities. I even let the Little One add a dog to her bedroom. After all, placing a large dog in the midst of the room did tell a lot about her. Though I did draw the line when my son wanted three beds in his room in case “the neighbors wanted to spend the night”; I did, however, let him choose a set of bunk beds.
Day 2: Taking a sharpie, I drew a box around the pictures that each of them wanted to use, making it easier for them to cut them out on their own. Little One still needed some help, but my son did most of the cutting himself.
Day 3: The kids chose the colors for their walls and floor, then painted away. I used plastic bags for their art aprons and a piece of Pallete art paper (similar to wax paper) that I had left over from college art classes. We really survived with very little incident.
Ready to Paint!Pink walls, pink floor–no surprise to anyone who knows her. Very Van Gogh-ish.
This was the extent of the mess at the end of the day.
Prep for Day 4: Meanwhile, I pasted the magazine pictures to cardstock. Then, I cut out the furnishings once more, leaving about a 1/2″ of space at the bottom. The extra would be folded over and glued to the floor of the bedrooms to make a 3-D effect.
Day 4: Once the bedrooms were dry, we got out our furnishings and the hot glue gun. I pasted the pieces in where they directed, with only a little bit of suggestion and intervention. Then, with our completed projects, we had a little “show and tell.” They each presented their rooms (why they chose the pieces for their rooms), we got pictures, and then we closed with a short review of Van Gogh.
It was a great finish to our study, and I can’t wait to launch into our next Van Gogh painting study. Here’s a close-up of the end results.
The boy’s room: minimalist, neat and ordered, with a little Curious George monkey in the cornerThe girl’s room: bright, fun, full, with a huge love of nature
Our third week of teaching Van Gogh, we studied his self-portraits. I pulled out my Usborne First Book of Art and read the pages on “Faces” and self-portraits. We looked at Giuseppe Arcimboldo’s painting “Summer” which is a painting of fruits and vegetables made to look like a person’s profile.
So we did a funny fruit face of our own.
I cut out a couple of big faces that I found in some magazine adds, plus lots of fruit and vegetable and flower pictures from magazines. Then, we matched the shapes of the fruit to the shapes of the facial features—and did a lot of laughing!
My final week of teaching Van Gogh, we finally made it to his sunflowers. I have been looking forward to this craft all summer long.
Waiting patiently to begin
Van Gogh’s sunflower paintings are probably among his most recognizable, and this fun craft is done in a style reminiscent of his. I got the idea, once again, from my Usborne First Book of Art.
First, you’ll need to cut the sponges into petal shapes. I did one for each color because I didn’t want to have to worry about rinsing before each layer.
Second, you’ll need yellow, orange, and green paint. Add a little (emphasis on little) flour to the paint to thicken it.
Third, layer the yellow and then the orange petals in a circle. Add the green “leaves.”
Last, I got out an assortment of colors and let the kids fingerpaint the centers of the flowers.
And the result, our own Van Gogh sunflowers!
The kids insisted on adding stems, as well.
I was really pleased with this craft. Not only was it simple for them to do, but it really was pretty controlled when it came to the mess. And the result was awesome.
We’ve had a great time covering the life and work of Van Gogh in a littles-friendly way. I love including fine art in our homeschool studies, and teaching Van Gogh has been a great place to start.